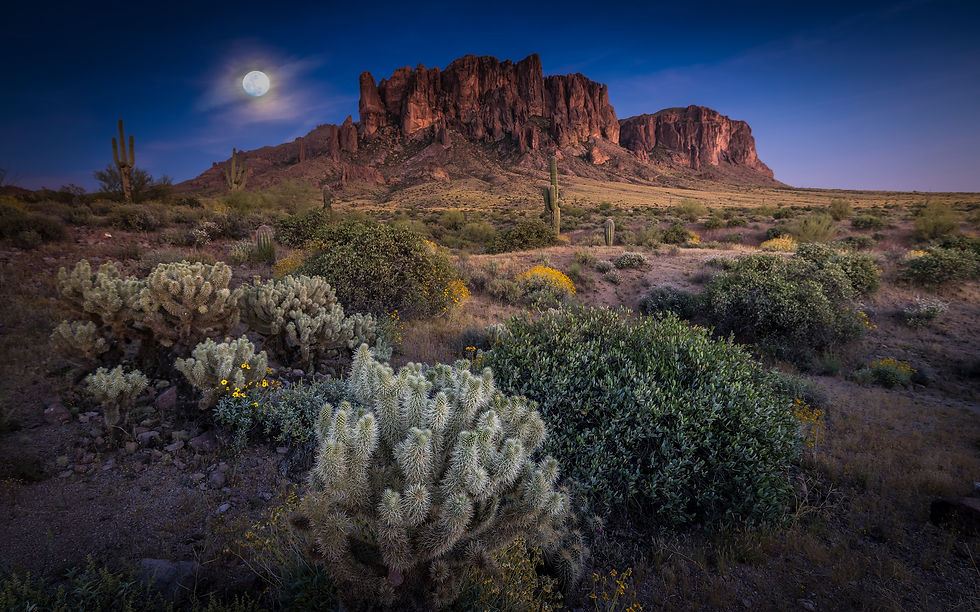
Mastering Long Exposure in Landscape Photography
- sdhammond2

- Mar 18
- 3 min read
Updated: Apr 9
Capturing the essence of a breathtaking landscape requires more than just a click of the shutter button; it demands an understanding of the tools and techniques that elevate your images from ordinary to extraordinary. Long exposure photography is one such technique that can transform a mundane scene into a mesmerizing masterpiece. In this blog, we'll delve into when to use long exposure, when to avoid it, the ideal exposure duration, and how to achieve the perfect balance.
When to Use Long Exposure:
1. Smooth Water Effects

Long exposure is particularly effective when photographing bodies of water. A slow shutter speed blurs the movement of water, transforming choppy waves into a silky, ethereal surface. This effect works wonders in coastal scenes, waterfalls, or serene lakeshores.
2. Cloud Movement in the Sky
To add drama and dynamism to your landscape, use long exposure to capture the movement of clouds across the sky. This technique can turn a static scene into a visually compelling narrative, especially during sunrise or sunset when the colors in the sky are most vibrant.

3. Creating Dreamy Atmospheres:
Long exposure can introduce an otherworldly quality to your images, making them feel dreamy and surreal. This is particularly effective in capturing the play of light and shadows in forests, giving your photos an enchanted and magical ambiance.
4. Creating Energy:

Sometimes it makes sense to add to a scene, such as in a city, to create light trails from moving cars. This fun to do and cretes of feeling that can draw the viewer in but can be hard if you cannot get light trails pulling into the shot.
When to Avoid Long Exposure:
1. Fast-Moving Subjects:
Long exposure is not suitable for capturing fast-paced action or subjects with rapid movement. It tends to blur elements in motion, resulting in an undesirable and distracting effect. Stick to shorter exposure times for subjects like wildlife, sports, or
bustling cityscapes.
2. Harsh Lighting Conditions:
In extremely bright conditions, using long exposure may overexpose your image, washing out details and colors. Opt for shorter exposures in such scenarios or use neutral density filters to control the amount of light entering the lens.
What is Too Long?
Determining the ideal exposure duration depends on various factors, including the speed of movement in the scene, the desired effect, and lighting conditions. However, as a general guideline, exposures longer than a few minutes can lead to overexposure and a loss of image clarity.
Achieving the Right Exposure Duration:
1. Experimentation is Key
Start with exposures ranging from a few seconds to a minute and review the results. Adjust the shutter speed based on the desired effect and the elements in your scene. Don't be afraid to experiment until you find the sweet spot.
2. Use a Tripod
Long exposure shots demand stability. A sturdy tripod is essential to prevent camera shake during extended shutter durations. This ensures sharpness in the stationary elements of your composition.
For travel, I typically bring along my light weight travel tripod from Manfrotto For wild, windy days, you need a much more robust tripod like the 190m Series from Manfrotto.
3. Employ Neutral Density Filters
Neutral density (ND) filters, like PolarPro's VND reduce the amount of light entering the lens, allowing for longer exposures without overexposing the image. These filters are especially useful in bright conditions or when shooting with wider apertures.
I am still playing with filters, but certainly, you'll have 3 choices: 1. glass sheets, 2. single stop and 3. variable. Glass sheets provide probably the best overall without vignetting around the edges, but are very hard to pack and handle and can risk damage easy. The single density filters are great but at times, you'll want flexibility. These are also cheaper as a solution. This leads to variable ND filters which is my choice. Variable filters provide you the ability to be agile and adjust the stops based on what you are seeing and the balancing your manual settings. There are many options and all good options from Kase, K&F, PolarPro, Tiffen, Hoya, and Kenko amongst others.
The Wrap Up
In the end, Mastering long exposure in landscape photography involves a delicate balance of creativity, experimentation, and technical know-how. By understanding when to use it, when to avoid it, what is too long, and how to achieve the right exposure duration, you can unlock the full potential of this captivating technique and elevate your landscape photography to new heights. It's also my favorite type of photography.
For a PowerPoint slide version of this Click Here
Join me on this journey, and let's explore the world through the lens of my camera together.
Please visit: FineArt America - Steve Hammond


Comments